Prerequisites
Ensure you have the following:
- Azure subscription with
ownerorcontributor+user access administratorrights - Global Administrator or Security Administrator role in Entra ID
Setup Sentinel
Step 1: Create a Log Analytics workspace
Sentinel runs on top of a Log Analytics workspace. The workspace stores all ingested logs and is where you run KQL queries.
- Search for ‘Log Analytics workspaces’ in the Azure portal
- Click
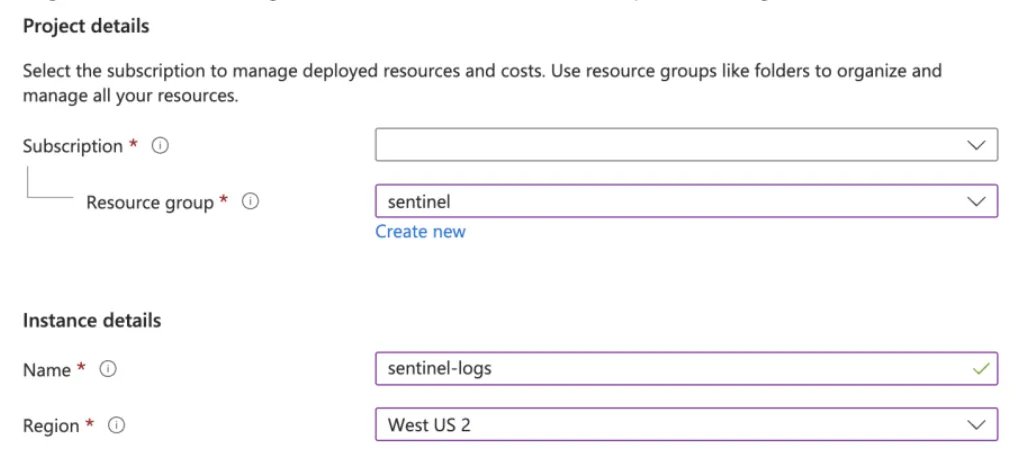
+ Create - Select your subscription and use the following values:
Resource group:sentinel(create new)
Name:sentinel-logs
Region: Pick a region close to you
- Click
Review + createthenCreate
Step 2: Enable Microsoft Sentinel
This adds the Sentinel solution to the Log Analytics workspace, enabling security-specific features and the Sentinel UI.
- Search for ‘Sentinel’ and select ‘Microsoft Sentinel’ in the Azure portal
- Click
+ Create - Select
sentinel-logscreated in previous step - Click
Add
Microsoft Sentinel is now configured! Next step is to start ingesting logs.
Ingesting Entra ID logs
Step 1: Configure diagnostic settings
Entra ID can send sign-in and audit logs to the Log Analytics workspace.
- Open the Entra ID admin center
- Go to Monitoring > Diagnostic settings
- Click
+ Add diagnostic setting - Name it
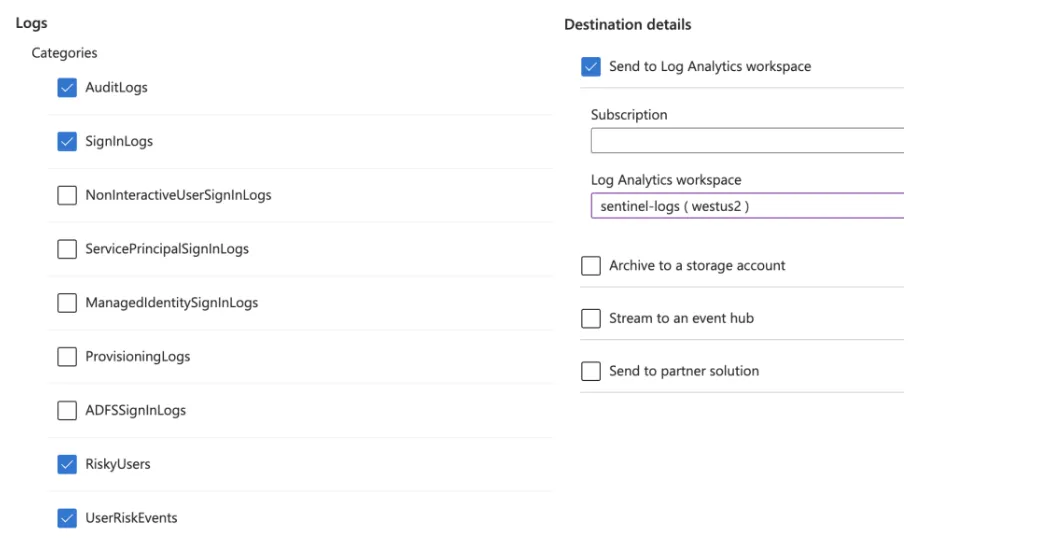
entra-id-sentinelor similar - Check the following categories under Logs (checking other options will increase price)
- AuditLogs
- SignInLogs
- RiskyUsers
- UserRiskEvents
- Check ‘Send to Log Analytics workspace’ under Destination details, and select the
sentinel-logsworkspace
- Click
Save
Step 2: Add the Entra ID data connector in Sentinel
The Sentinel connector activates built-in analytics rules and workbooks for Entra ID.
- Open the Microsoft Defender admin center
- Go to Microsoft Sentinel > Content management > Content hub
- Search for or scroll down to find
Microsoft Entra IDand check the checkbox - Click
Install/Update - Once installed, go to Microsoft Sentinel > Configuration > Data connectors
- Select
Microsoft Entra IDin the list and pressOpen connector page - Ensure the same options checked in Step 1.5 is also checked here
Entra ID logs are now connected to Sentinel. It can take a few hours for logs to start appearing.
Step 3: Enable UEBA
UEBA builds behavioral baselines for users and flags anomalies like unusual access patterns, impossible travel, or privilege escalation attempts.
- In the Azure Portal, search for ‘Sentinel’ again, and select
sentinel-logs - Scroll down to Configuration > Settings > Settings tab > Set UEBA
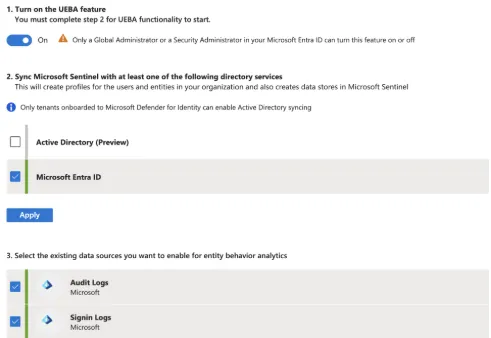
- Turn on UEBA
- Check
Microsoft Entra ID, then clickApply - Check
Audit LogsandSignin Logs, then clickApply
UEBA is now fully configured.